How to know if your 3D printer nozzle is clogged? Are you experiencing quality issues due to inconsistent extrusion in your printed parts?
Imagine that you are using our TPU Filaflex filament, which is the perfect flexible filament for your prints. However, during the printing process, you notice small imperfections or holes between the layers of the piece. This indicates an inconsistency in the layers, possibly caused by a problem in the extrusion flow. But don't worry, there is a solution! In this article, we will explain how to effectively clean partially blocked nozzles using a method we call 'Cold Pull' or 'Atomic Method'. Keep reading to learn all the details!
.jpg)
Image above: In this image we can see a comparison between two pieces printed with Filaflex 82A. On the left, the piece was printed with a partially blocked and uncleaned nozzle, while on the right, the same nozzle underwent a cleaning process. It can be clearly appreciated how the quality of the piece on the right is noticeably superior, with a homogeneous, optimal and high-quality extrusion, without any imperfections such as bald spots or holes between the layers.
Is the nozzle clogged?
It is possible that the nozzle of your 3D printer is clogged even if it continues to extrude plastic. In fact, there can be two types of clogs in the nozzle of your printer, complete clogs and partial clogs. In the case of complete clogs, it is simple, as your 3D printer will not be able to extrude plastic. However, in partial clogs, carbon or accumulated remnants of particles from other materials will block part of the nozzle despite it continuing to extrude material. In these cases, the flow of your 3D printer is not correct and you will experience problems with extrusion of little plastic that will affect the quality of your printed piece.
Difference between a partially clogged nozzle and a completely clogged nozzle
It is essential to understand the difference between a partially clogged nozzle and a completely clogged nozzle:
- A partially clogged nozzle allows the printing material to pass through, albeit with difficulty.
- A completely clogged nozzle completely prevents the flow of material.
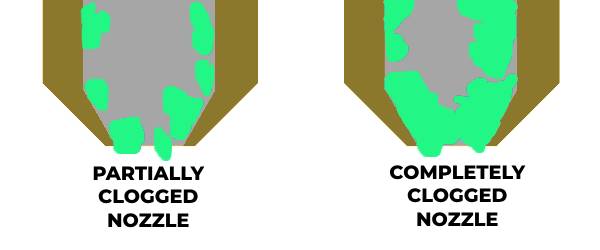
Image above: Difference between a partially clogged nozzle and a completely clogged nozzle.
What are the symptoms of a partially clogged nozzle?
A partial clog of the nozzle can manifest in different ways. Some of the most common symptoms include:
- Decreased print quality. This results in irregular or incomplete lines in the printed piece.
- Flow irregularities. The extrusion flow is not proper and presents problems and defects in the piece.
It is important to pay attention to these signs in order to address the problem in a timely manner.
.jpg)


Image above: Detail of a printed piece showing irregular layer lines due to a partially obstructed nozzle.
What factors can cause clogging in printer nozzles?
Among the most common factors, we can highlight:
- Small nozzles. Small nozzles are more prone to accumulate residues, as the smaller the nozzle, the more complicated its extrusion will be.
- Regular use.We have to take into account that due to normal and regular use of the printer, some residues can gradually accumulate.
- Use of temperatures outside the recommended range by the manufacturer. Using temperatures outside the recommended range, as well as allowing the filament to remain hot without flowing for a long time, can also affect nozzle clogging. The filament will deteriorate and accumulate on the hotend walls as residues.
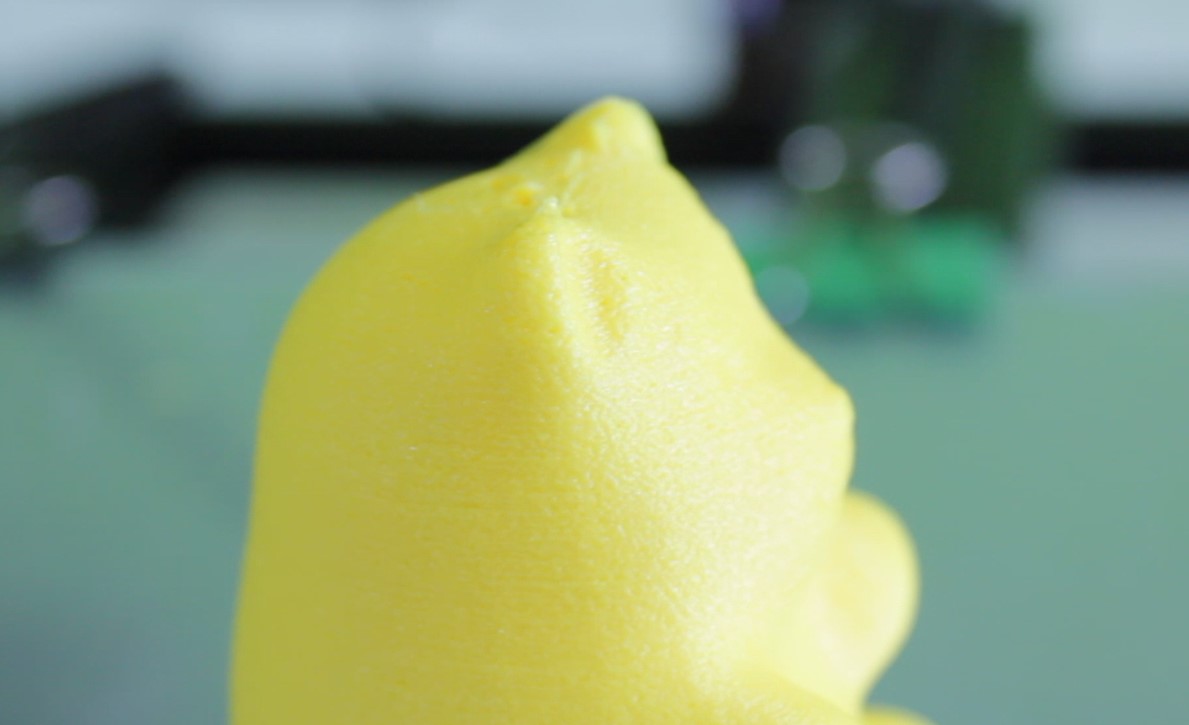
Image above: Detail of a printed part that shows a quality finish after applying the nozzle cleaning method.
How can we clean partially clogged nozzles?
When we have a partially clogged nozzle, we should proceed with its cleaning. This is a simple and highly recommended action that is essential to maintain optimal performance and avoid clogs that can affect the quality of our prints. We will use a method called Cold Pull or Atomic Method.
'Cold Pull' cleaning method or 'Atomic Method'
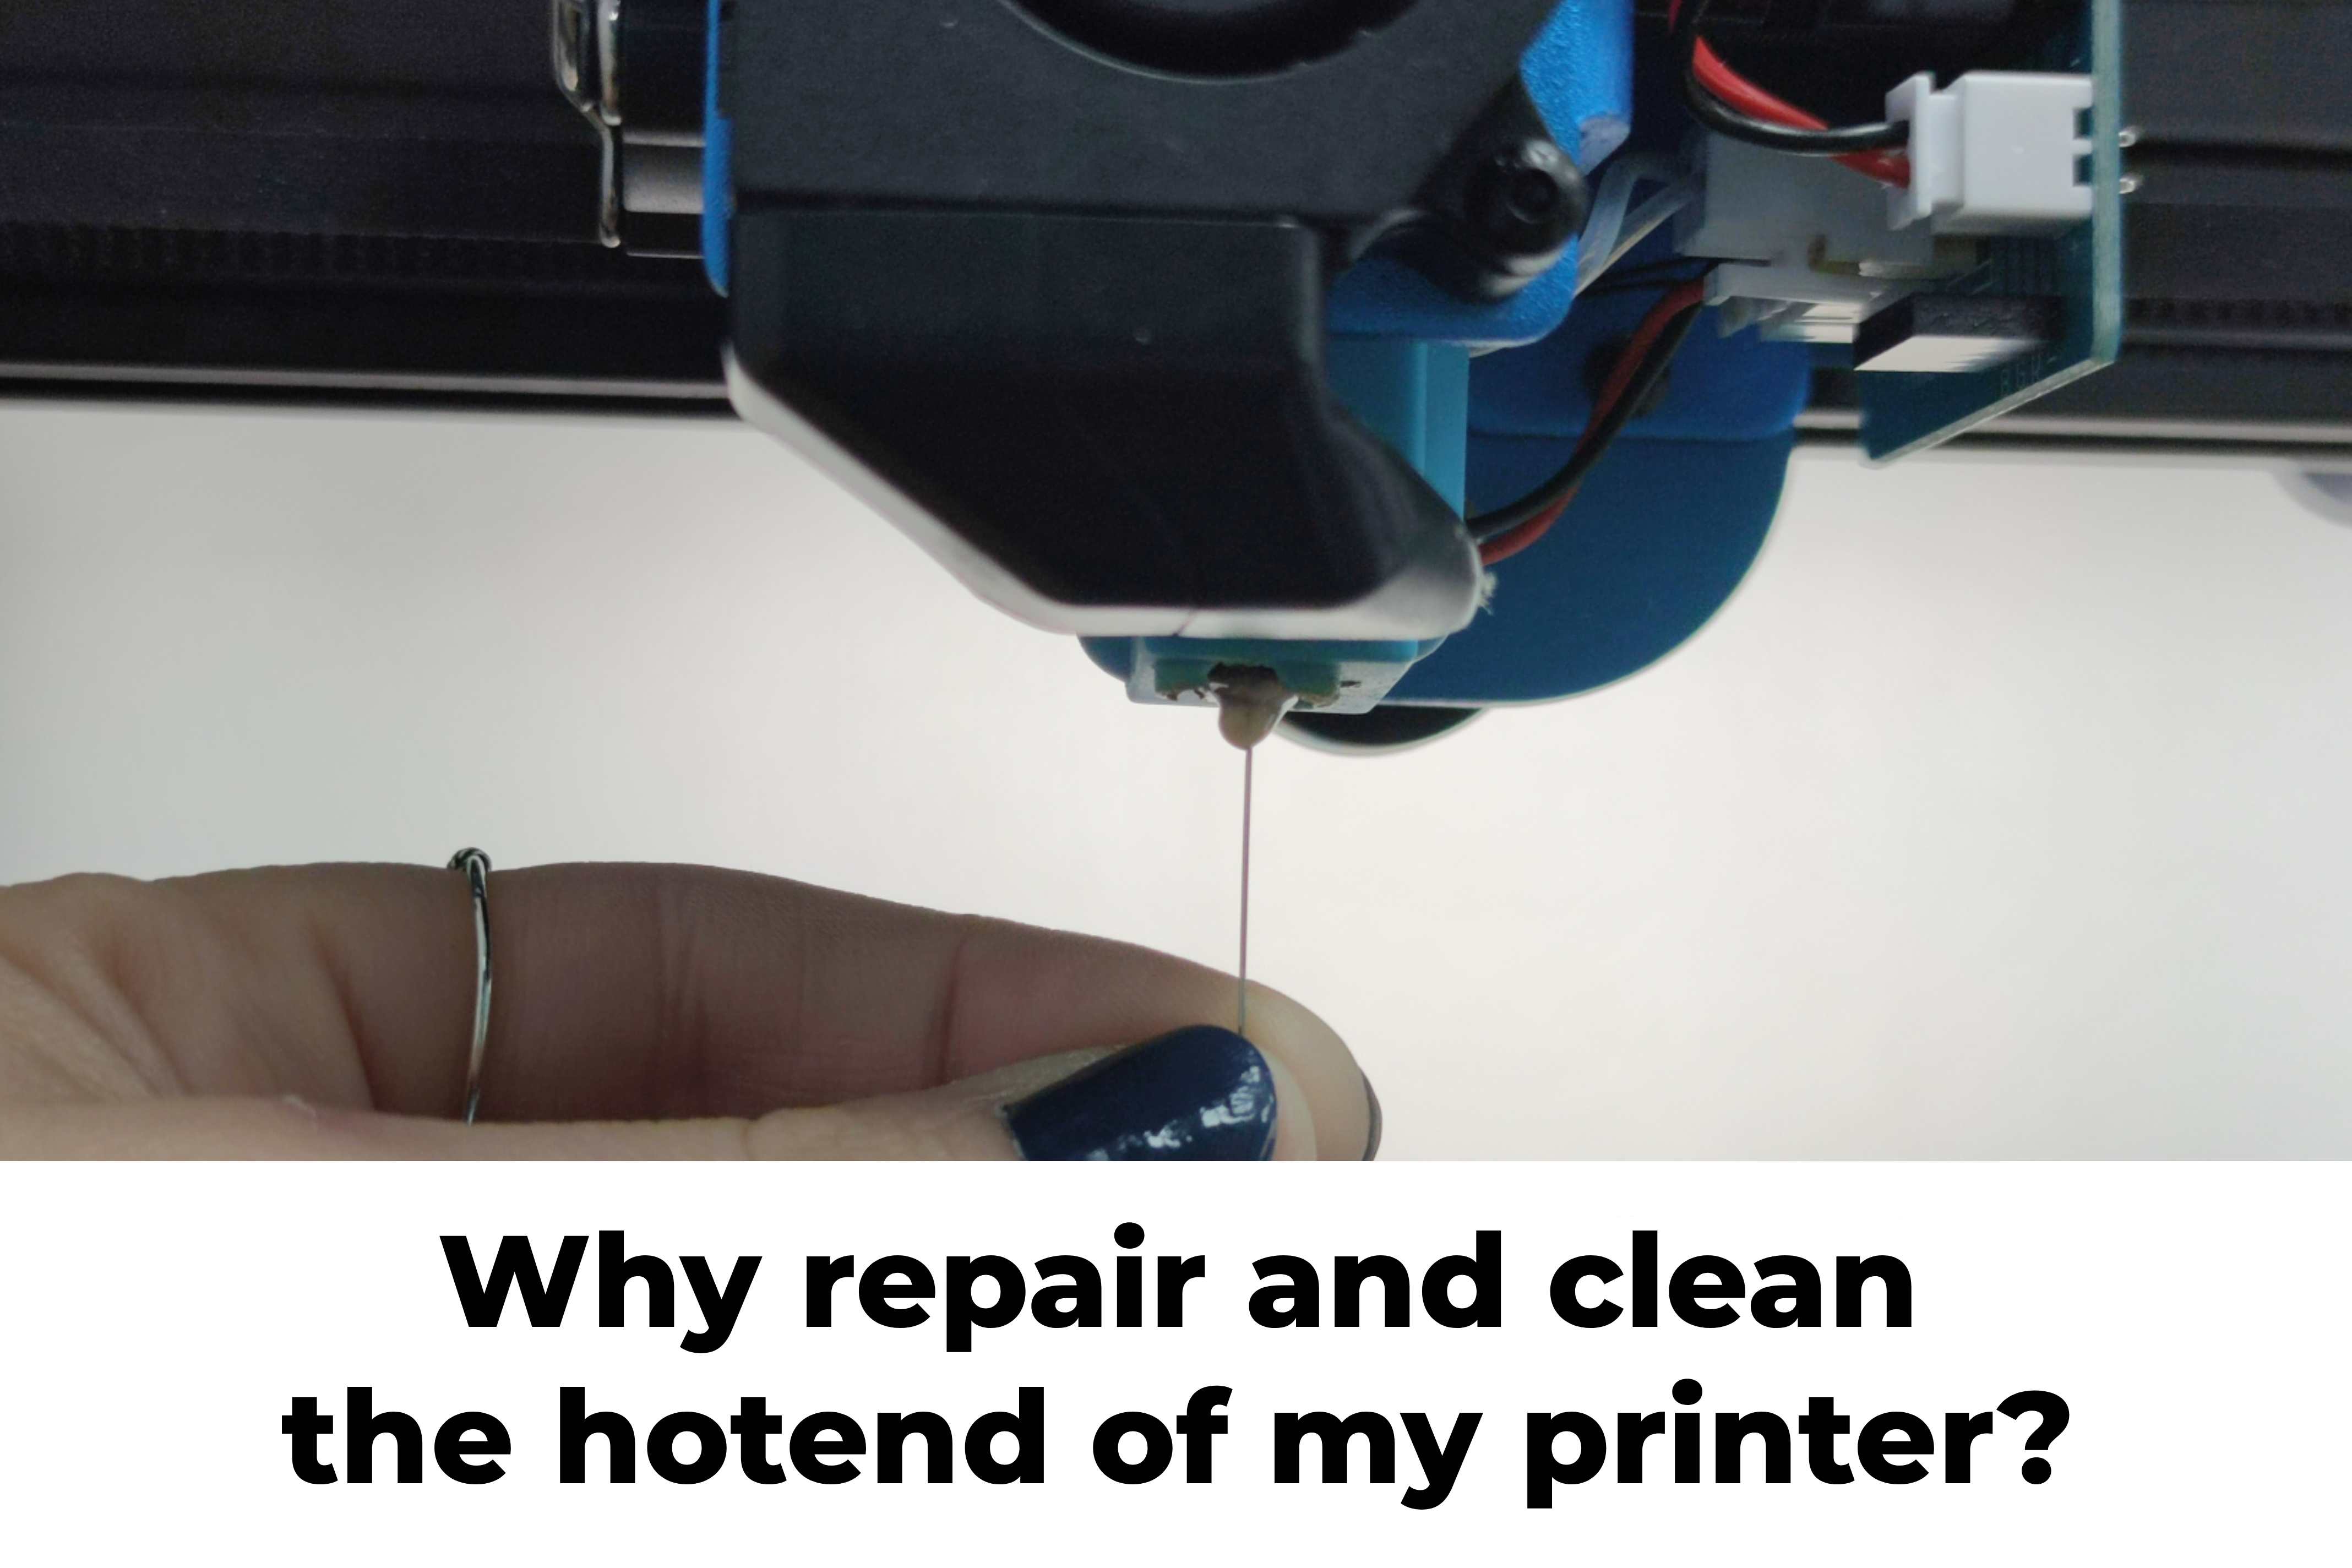
Cold Pull cleaning method or Atomic Method is an excellent technique for cleaning and resolving clogs in partially blocked nozzles of a 3D printer. It allows the printing material to flow correctly and is an effective method for removing any obstruction or residue that may be interfering with filament flow through the nozzle. Since it is a simple technique to perform, it does not require the complexity of dismantling the hotend, making it highly recommended for any problems related to extrusion, and always preferable to any other intervention such as changing nozzles or performing any mechanical cleaning.
.jpg)
Image above: Before and after result of a printed piece with Filaflex 82A filament. On the left, the piece was printed with a partially blocked and uncleaned nozzle, while on the right, the same nozzle underwent a cleaning process.
Let's see this method step by step using transparent PETG filament.
To perform the cleaning method, we will need filament, preferably of a light color like transparent, to easily see the residues that we will remove and drag.
This method can be done with any material, although "sticky" materials with some flexibility and resistance will be most suitable. We always recommend using transparent PETG filament. This filament adheres very well to residues and is strong enough to pull out any obstructions. Additionally, its working temperature is intermediate, which will help if we were printing with materials that require a higher temperature, such as cleaning a clog from flexible filament or TPU filament like Filaflex. The procedure consists of heating the printer nozzle to an appropriate melting temperature for the material used, in this case PETG, and then quickly cooling the nozzle to a lower temperature. During the rapid cooling, slight pressure is applied to the filament to extract any obstructions or residues.
The procedure consists of heating the printer nozzle to an appropriate melting temperature for the material used, in this case PETG, and then quickly cooling the nozzle to a lower temperature. During the rapid cooling, slight pressure is applied to the filament to extract any obstructions or residues.
Image above: Transparent PETG filament spool, the material we usually recommend for performing this nozzle cleaning method.
Now, we will see step by step how we should perform this process:
1. Insert the transparent PETG filament and heat the nozzle to a slightly higher temperature than recommended for this printing material.
2. Extrude some material if possible. If the nozzle does not extrude any material, we can use a needle with a smaller or equal diameter to the nozzle to help the material come out.
3. Cool down the hotend to 80-110ºC. Start with low temperatures, if the material comes out without bringing any residue, try again with a slightly higher temperature.
4. Pull the filament firmly and consistently (loosen the tension of the extruder's tensioner to allow us to do this without any obstacles).
Once the filament is extracted, we will see how it drags the residue from the previous filament and, depending on the case, we may see pieces of burnt filament.
We recommend performing this operation as many times as necessary until we manage to extrude the filament cleanly so that no particles remain that can continue to hinder the printing. This way we will know that the nozzle is already clean and without any residue.
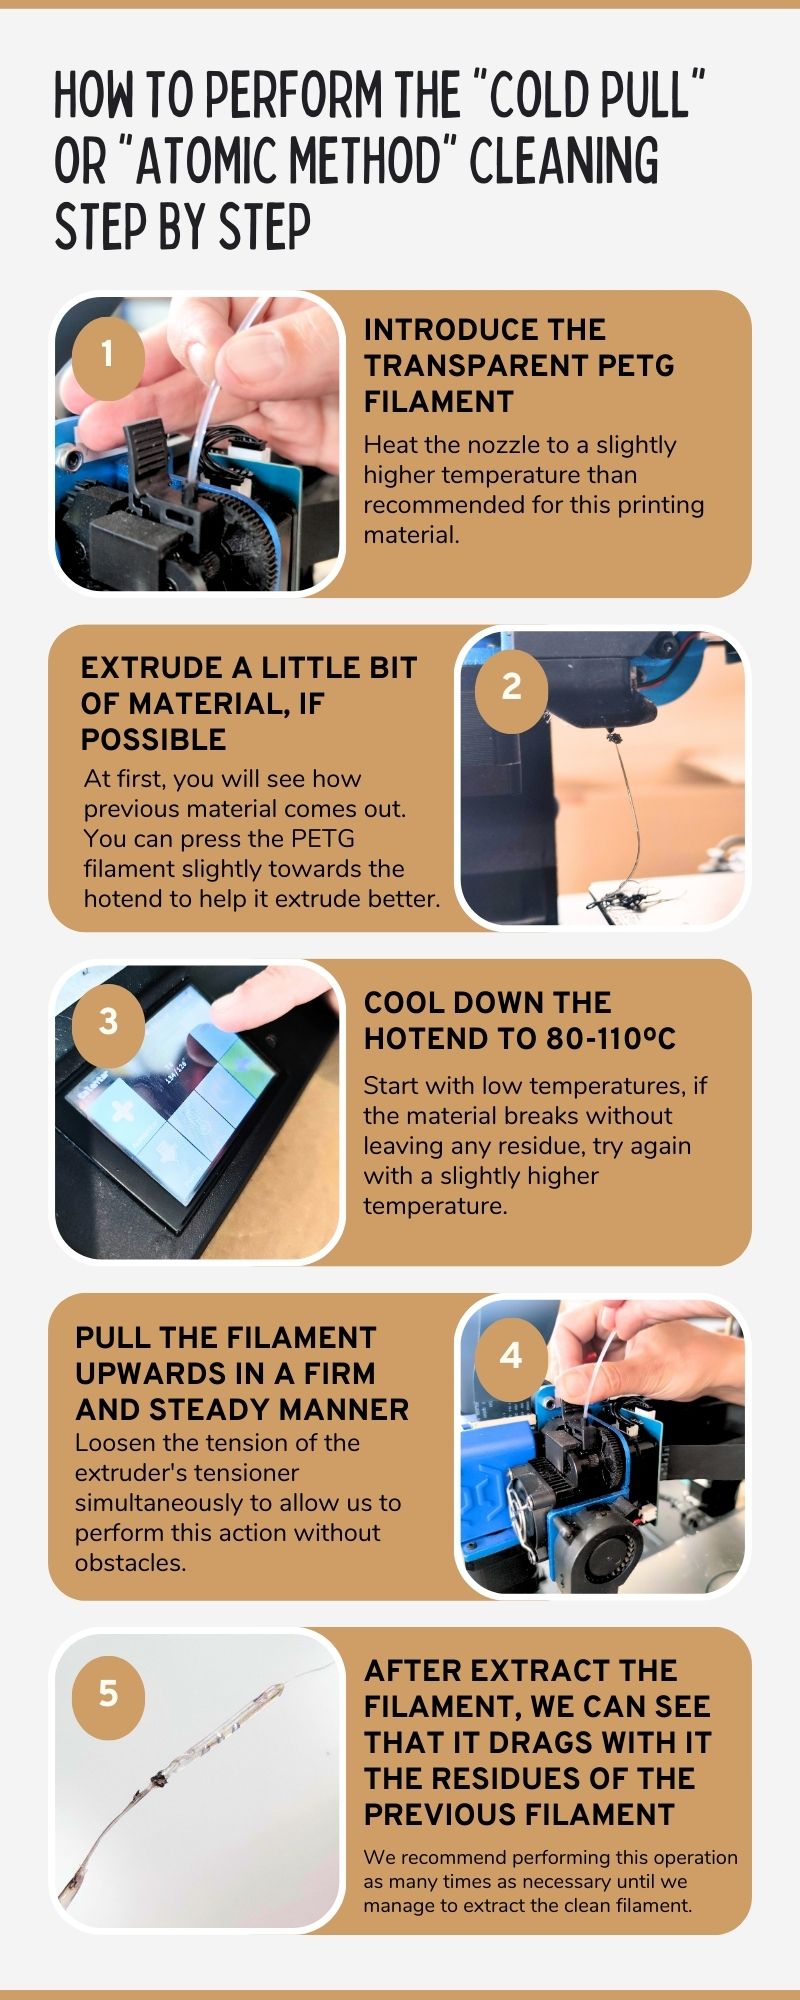
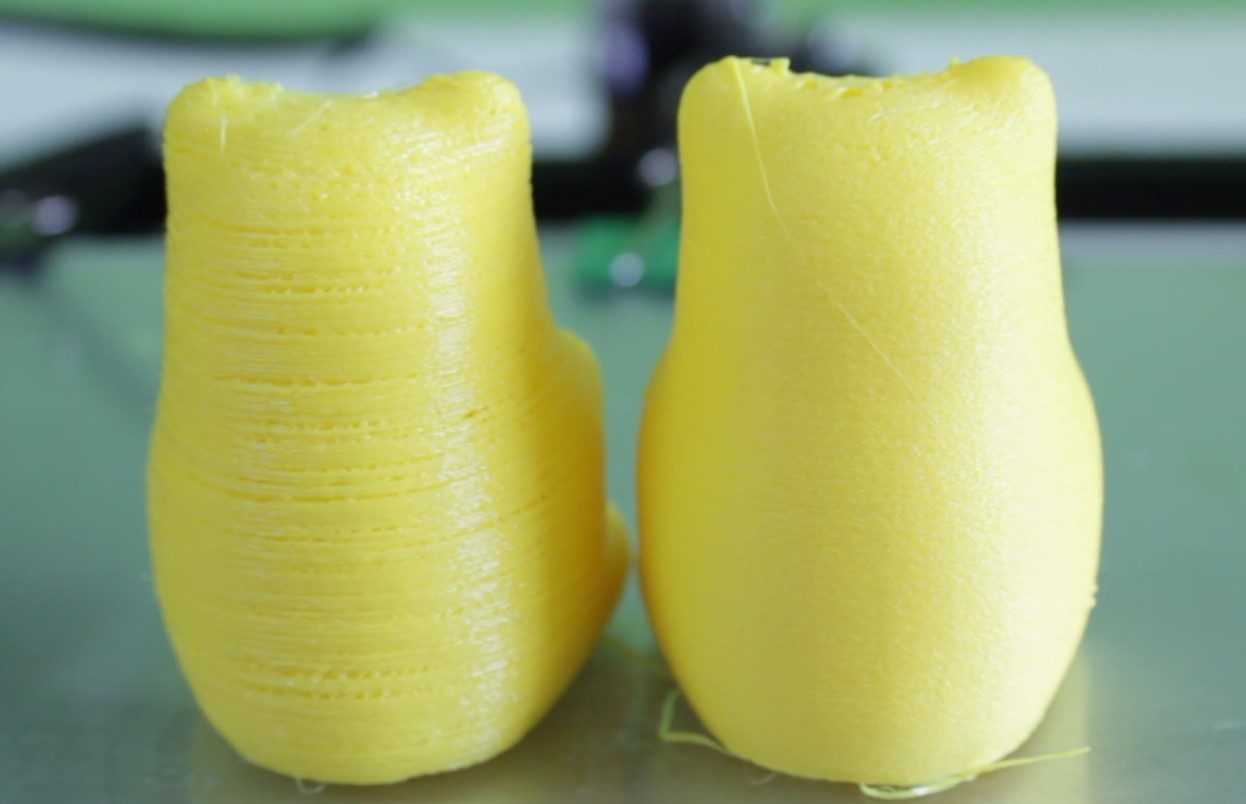
Image above: Detail of the before and after printing the same piece with Filaflex 82A. On the left, [BEFORE] the piece was printed with a partially blocked and uncleaned nozzle, while on the right [AFTER], the same nozzle was subjected to a cleaning process. It can be clearly seen how the quality of the piece on the right is noticeably superior, with a homogeneous, optimal, and high-quality extrusion, without any imperfections such as bald spots or holes between the layers.

 it
it  es
es en
en fr
fr de
de